NetSuite Connector
The NetSuite connector in SyncNow enables secure and flexible synchronization of records, fields, attachments, and more between NetSuite and other work systems.
🔑 Setting NetSuite Token Authentication
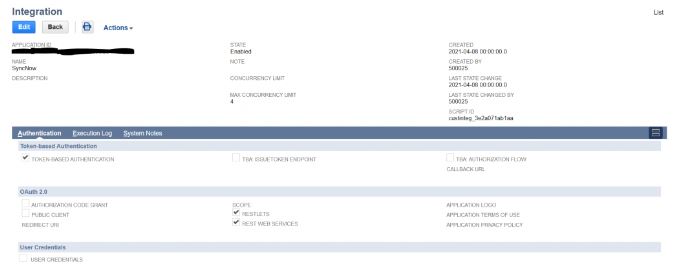
1. Create an Integration Record
The Integration Record identifies the application in NetSuite’s system.
- Navigate to Setup → Integration → Manage Integrations → New.
- Create an Integration Record if none exists.
- After creation, retain the API Key and API Secret.
- Retain the Application ID.
- If the Integration Record already exists but lacks an API Key and Secret, edit the record, click Reset Credentials, and set:
- Name: Your-Application-Name
- Authentication: Token-Based Authentication
- State: Enabled
SyncNow connector uses NetSuite Token authentication. Here’s how to configure NetSuite to work with SyncNow.
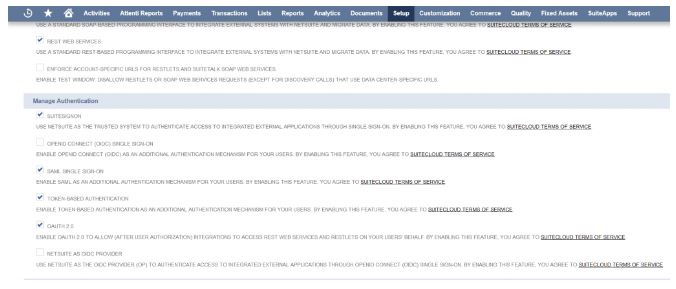
2. Enable Token Authentication
- Navigate to Setup → Company → Setup Tasks → Enable Features → SuiteCloud → Manage Authentication.
- Ensure Token Based Authentication is enabled.
- Click Save.
3. Set an Integration Custom Role
- Navigate to Setup → Users-Roles → Manage Roles → New.
- Create a new role, enter name and ID.
- Set the necessary permissions for SyncNow to work properly.
- For every record type to be synchronized as target, include edit and read permissions.
- For custom record types, add permissions in the custom record tab.
- For Token-based Authentication, include under the Setup subtab:
- Access Token Management
- User Access Tokens
- SOAP Web Services
- REST Web Services
- Log in using Access Tokens
4. Create Access Tokens
- Navigate to Setup → Users-Roles → Access Tokens → New.
- Select the application and role you created earlier, then click Save.
- Retain the Token ID and Token Secret.
5. Account ID
- In NetSuite Admin, click Setup → Integration → Web Service Preferences.
- Retain the Account ID displayed.
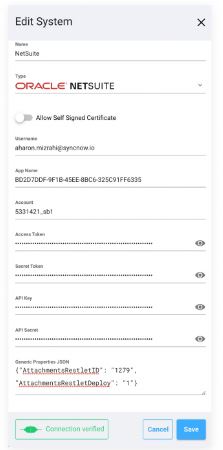
Set: API Key, API Secret, Application ID, Token ID, Token Secret in the SyncNow System connector dialog.
📎 Create RESTlet Script for Synchronizing Attachments
To add support for attachments synchronization:
- Navigate to Customization → Scripting → Scripts → New.
- Press the + button.
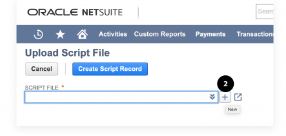
- Upload
AttachmentRestlet.js(found in the installation directory under Install → scripts → NetSuite).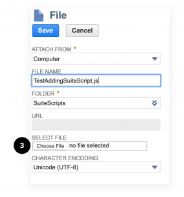
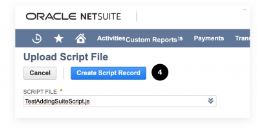
- Press Create Script Record.
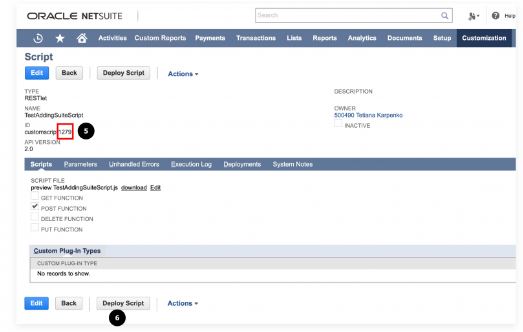
- Retain the Attachments Suite Script ID.
- Press Deploy Script.
Set: API Key, API Secret, Application ID, Token ID, Token Secret, and Attachments Suite Script ID in the SyncNow System connector dialog.

🗂️ Fields Support
SyncNow supports most NetSuite field types. However, NetSuite calculated fields and fields that do not store value cannot be synchronized.
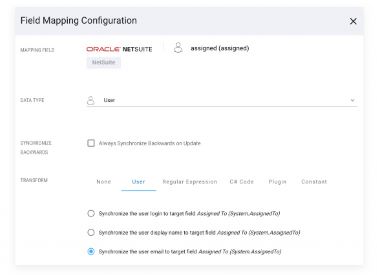
👤 User Fields
- Reference fields that refer to Employee or other user records can be mapped as User fields.
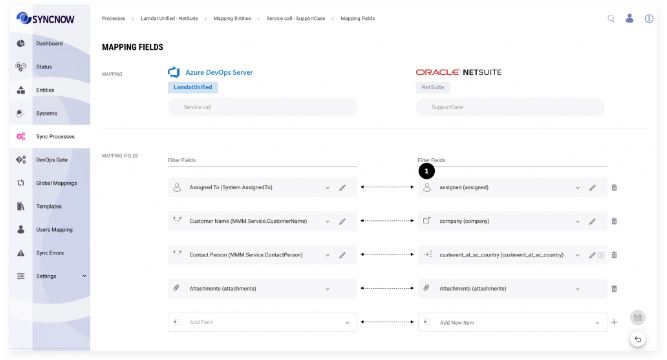
- If the target field is not a User field, specify which property to save (email, full name, or username).
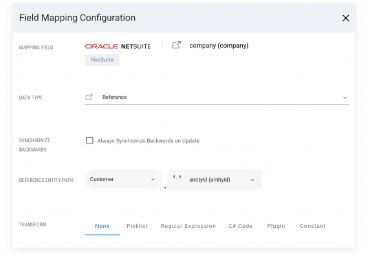
🔗 Reference Fields
![]()
To synchronize any Reference field, add a reference path to the desired child entity (up to 30 levels deep).
📋 List Reference and Attachments Fields

No extra configuration is required to synchronize List Reference and Attachments fields.
🌐 HTML Fields
- To synchronize an HTML field from NetSuite, set the field data type to HTML.
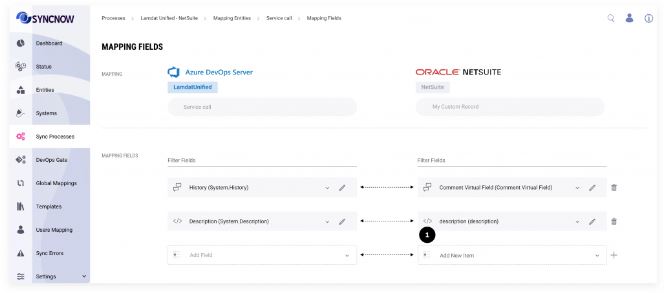
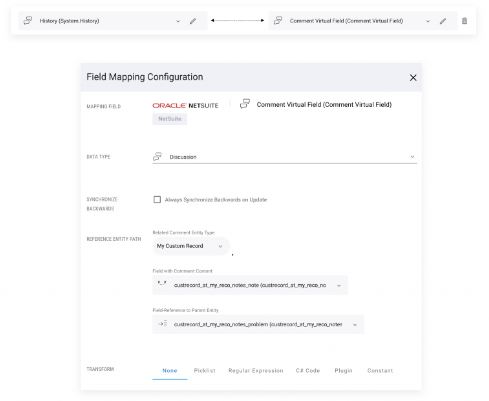
💬 Discussion Fields
To synchronize discussions, select the Comment Virtual Field for NetSuite and refer to its real sub record. The Custom Sub Record should have at least:
- A field with the message
- A field referencing the parent record
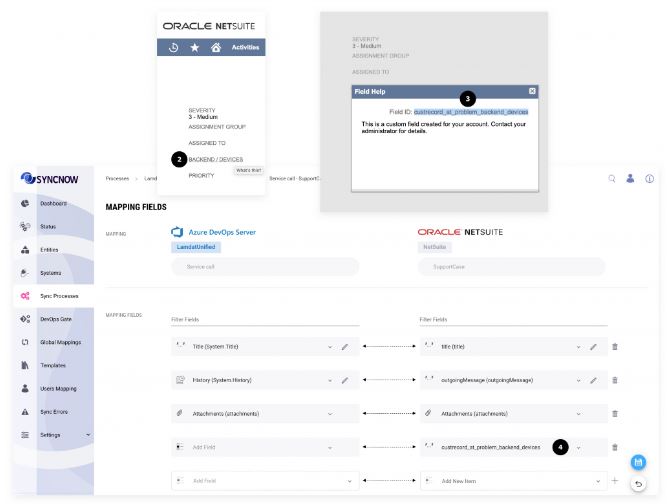
⚠️ NetSuite Limitations
- Not all custom fields appear in the available fields list during field mapping.
- If you cannot find a field:
- In NetSuite, open any existing record of the entity type whose fields you want to synchronize.
- Click on the field name that you cannot find in Fields Mapping in SyncNow UI.
- Copy the name of the field.
- Paste it in the appropriate fields pair.